Thermography in Quality Assurance
Quality assurance and process enhancement is essential to complex industrial processes. Leading businesses rely on certified quality management, to allow for matters of quality and environmental sustainability even during the early stages of manufacturing development. In co‐operation with a leading automotive supplier, InfraTec GmbH enhanced the automated thermography monitoring solution PRESS‐CHECK to inspect the product quality of press hardening with an accuracy of 100 %.

Automotive manufacturer and automotive suppliers demand high quality standards of its own products and follow a strict zero‐defects‐policy. With internal audits for quality and environment this will be continuously, controlled and guaranteed.
InfraTec Solution
Quality and Precision Control of Press Hardening – PRESS-CHECK
Test the thermal state and lateral adjustment of metal sheets contactless during the press hardening process and ensure the required distribution of strength and high quality of all produced pressed parts.
Mainly, sheet metal parts are formed by cold pressing, which requires good rheological behaviour. However, high stability is required as well. It can be obtained by several approaches. If the sheet metal does not have a sufficient diameter, it will be reinforced with stiffening structures during the pressing stage. It is also possible to harden thin sheet metal parts to obtain higher strength. The required structural change is effected by a defined cooling of the previously heated material. The reshaping of hardened sheet metal is complicated, since the now occurring spring effect results in high tolerances.
The combination of shaping and cooling during the pressing stage – called press hardening – can be an alternative. It combines both advantages: reshaping free from breakage and increase of strength. Parts which have been produced this way are lighter and show the same strength as those produced conventionally. Pressed goods, such as axle parts, beams and suspensions which come from hot forming and which are used in critical parts of a vehicle have to be checked particularly carefully. That is why today automotive suppliers use thermography as standard for a completely process‐synchronic mechanism to measure temperature during the production stage, to ensure the required quality of every single part.
Besides temperature measuring the position control, position detection and double sheet detection are becoming more important for the process monitoring. Parameters like this ensure reducing tool wear and preventing tool damage. These tasks can be perfectly combined with thermography.
Application of Thermography in Non‐destructive Testing
Randomised and contacting thermometry with contact thermometers, as well as measurements with pyrometers parallel to the manufacturing process do not allow for complete monitoring of the cooling process of the entire component. The alternative method of destructive testing to determine the mechanical characteristics is linked with expenses and waiting time which do not guarantee an ideal manufacturing process.
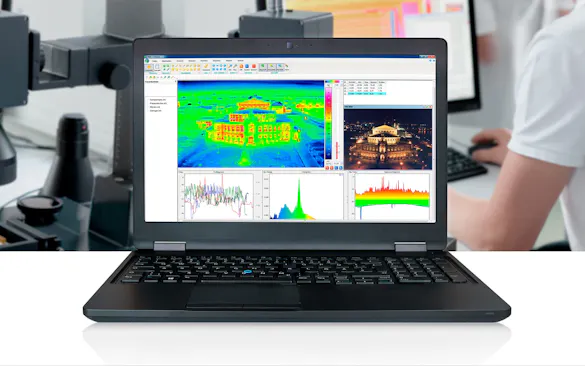
Thermography offers a safe and efficient solution in the field of material testing. As an extensive, non‐contact and automated measuring procedure, it is capable of recording thermograms and evaluating them according to predefined thresholds and limits. The most advantageous aspect of thermography is receiving a quick qualification of thermal imperfections in less than a second – even during the running manufacturing process, without an impact on the press‐hardened parts. The very reliable evaluation of the collected data is reason for the following sorting of imperfect parts and the resulting necessary process optimization. Post‐hoc and large‐scale analysis of collected thermograms is possible on every computer, using the IRBIS® 3 professional thermography assessment software, made by InfraTec.
Specific Customer Requirements Demand for Individual Solutions
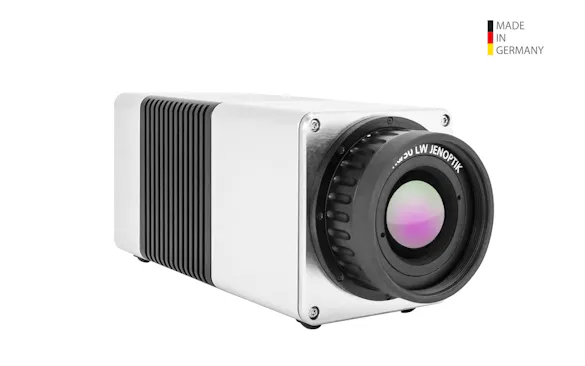
The process of pressed parts manufacturing, in a case of application, generally consists of the following steps: before entering a press, the sheet metal parts will be heated in a continuous furnace. Inside the press, the parts will be cooled down again. The so‐created mechanical characteristics are essential for the following application as chassis in automotive engineering. The redundant heat is detracted by a controllable liquid cooling. To monitor and control the temperatures completely before and after pressing two special HD thermographic cameras are used, which are precisely calibrated for each temperature range. Additionally, the position control of metal sheets, position detection and double sheet detection is controlled with the system to reduce tool wear and to prevent tool damage.
This customised automation solution PRESS‐CHECK is based on InfraTec’s long‐term experiences in infrared thermography technology in various industrial branches. The planning of a metering project is always preceded by a full‐scale analysis of the test circumstances. A modular system of thermographic automation is the starting point of every customised solution. Consisting of thermography camera‐, transmission‐, gauge‐, interface‐, industrial computer‐, and software‐components, it allows for flexible tailoring to the exact requirement, based on well‐tried modules. Process heat‐based thermography automation solutions mostly rely on compact and very robust, uncooled microbolometer camera technology.
The special unique of InfraTec’s automation solution is the flexible one‐source solution with the efficient capability to create thermal images in real‐time. The process thermometry and the position control and double sheet detection happens without contact, using industrial computers to control two thermographic cameras: one side a PIR uc SWIR HD with (1,280 x 1,024) IR‐pixels in the short wave spectral range (0.7 … 1.1) μm around 950 °C and on the other side after pressing a VarioCAM® HD head with (1,024 x 768) IR‐pixels in long wave spectral range (7.5 ... 14) μm. An area of approximately (2.5 x 2) m can be captured at the current working distance. The geometrical resolution of (1,280 x 480) IR‐pixels detects objects of a minimum size of 2 mm. In the hot forming process described above, the sheet metal part is picked up by a claw and then hovers above the camera until the metering is done. The repeating accuracy of the claw‐mechanics is very high, therefore the sheet metal will be positioned with only minimal variation. This allows for several tasks: ranging from an easy comparison with a previously saved reference image, to calculations of extensive dispersion of temperature differences.
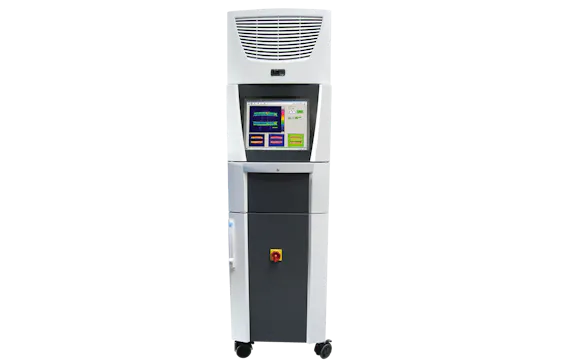
Utilisation of a software‐based evaluation of the thermograms ensure observing process specific temperature limits. For instance, if an increased temperature is detected in an area on the preform, the pressed part will be sorted out, since it would not have the necessary structure and therefore lack strength.
The thermometry sequence is controlled by an industrial computer, which is connected to the superior process guide‐system of the press that feeds the computer information about the ongoing process. The specifically customised thermography software PRESS‐CHECK organises the test sequence and evaluates digital images delivered by the thermography camera. The results will be sent to the guide‐system of the production process in accordance with the presses clock cycle. It is possible to manage different moulds and evaluate and record their respective data at once. This guarantees universal system operation for various orders which are being processed by the machine.
Automated Thermography Measurement Methods for High Reliability
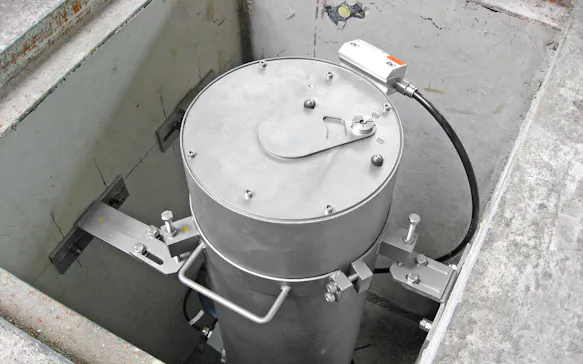
During the realisation of the thermographic quality assurance system, the focus is particularly on its reliability. Therefore, important components are equipped with monitoring‐ and self‐reactivation mechanisms. Consistent production can only be ensured by a consequent realisation of measures that guarantee continuous operation. The amount of wearing parts is reduced to a minimum and every part can be exchanged quickly. Air conditioning in the evaluation unit provides for a stable process environment, even in varying temperatures. The converter components and sensors inside the measuring head of the press are covered with a housing made from stainless steel to protect the measuring instruments. The house also allows for adjustment of the optical axis and has a pneumatically powered hatch, which reduces soiling to a minimum. During the metering, an air curtain ensures that no tinder can reach the lens. Overpressure inside the camera housing keeps the components dust‐free and prevents a congestion of hot air.
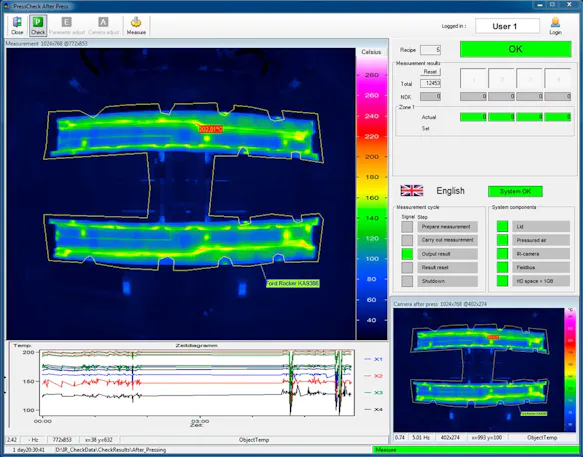
Incorrect operation can be prevented with an user administration with password protection and adjustable access rights. Furthermore, the automated measuring process will not allow any changes of parameter settings in order to prevent unauthorised alterations. It is possible to start the analysis software in an automatic inspection mode to ensure unattended system operation. Settings which are relevant to the system's output quality, such as the introduction and change of reference mouldings, can only be controlled by authorised personnel. Every moulding can be assigned an individual set of parameters, which will be used by the press for their respective production order. Each set includes a number, a reference image that shows the tested area and the assessment criteria. Therefore, no manual change will be necessary to adjust the production. Reliable measurements are guaranteed from the very beginning, as well. To parametrise the press goods, they will be matched with a softwaremask. To do that, a suitable press part will be analysed thermographically. The degree of emission of the product's surface can be determined beforehand to ensure accurate measurements.
Thermal Images for Zerodefects‐, Quality‐ and Environmental Policies
Thermal images for zero‐defects‐, quality‐ and environmental policies This individual automation solution guarantees and monitors the quality and is proved in several presses for different suppliers. The completely automatic quality assurance with outspoken reliability for press hardening is the basis for maximum occupancy operation.
In addition, plannable short maintenance breaks allow a minimisation of idle time. High product requirements as well as safe handling under harsh conditions are standards that can be met with InfraTec's automated infrared measurement solution. Individual configuration of controllable data analysis and evaluation is made possible by the modular system PRESS‐CHECK. Additionally, comprehensive examination of thermograms can be done with the IRBIS® 3 software. Follow‐up costs can be stopped by means of complete inspection, since no defective parts will be built‐in any more. The effect of the measurement output at the press on the optimisation of the cooling process is essential to meet the customer's product requirements. Higher acceptance of high‐quality parts in automotive engineering affirms investments in product‐ and process optimisation through higher long‐term volume and certification of the quality management system.
